Table of Contents

💡 Tip: Jump to 1:15 for Azure Setup
Step 1.1 - Register Azure resource providers
Before deploying EagleEye, make sure the following Azure resource providers are registered in your subscription:
- Microsoft.App
- Microsoft.Authorization
- Microsoft.CognitiveServices
- Microsoft.ContainerInstance
- Microsoft.ContainerRegistry
- Microsoft.Insights
- Microsoft.KeyVault
- Microsoft.ManagedIdentity
- Microsoft.Network
- Microsoft.OperationalInsights
- Microsoft.Sql
- Microsoft.Storage
- Microsoft.Web
To check and register, follow the official Microsoft guide: Register resource providers in Azure Portal
Step 1.2 - Get Your Azure Tenant ID
You will need your Azure Tenant ID for configuration:
- Sign in to the Azure Portal
- In the search bar, type "Microsoft Entra ID"

- Go to Manage Tenants and copy the Tenant ID (Organization ID)


Note: If you have multiple tenants, ensure you select the correct one for EagleEye deployment.
Step 1.3 - Get Your Azure Group Name
You will need an Azure group for EagleEye to perform email analysis. This can be either an existing Azure group or a new one you create.
⚠️ Warning: EagleEye can only analyse mailboxes for internal users within your Microsoft 365 tenant; external email addresses, guest users, or mailboxes outside your tenant are not supported.
To create a new group or find an existing one:
- Sign in to the Azure Portal
- In the search bar, type "Groups"
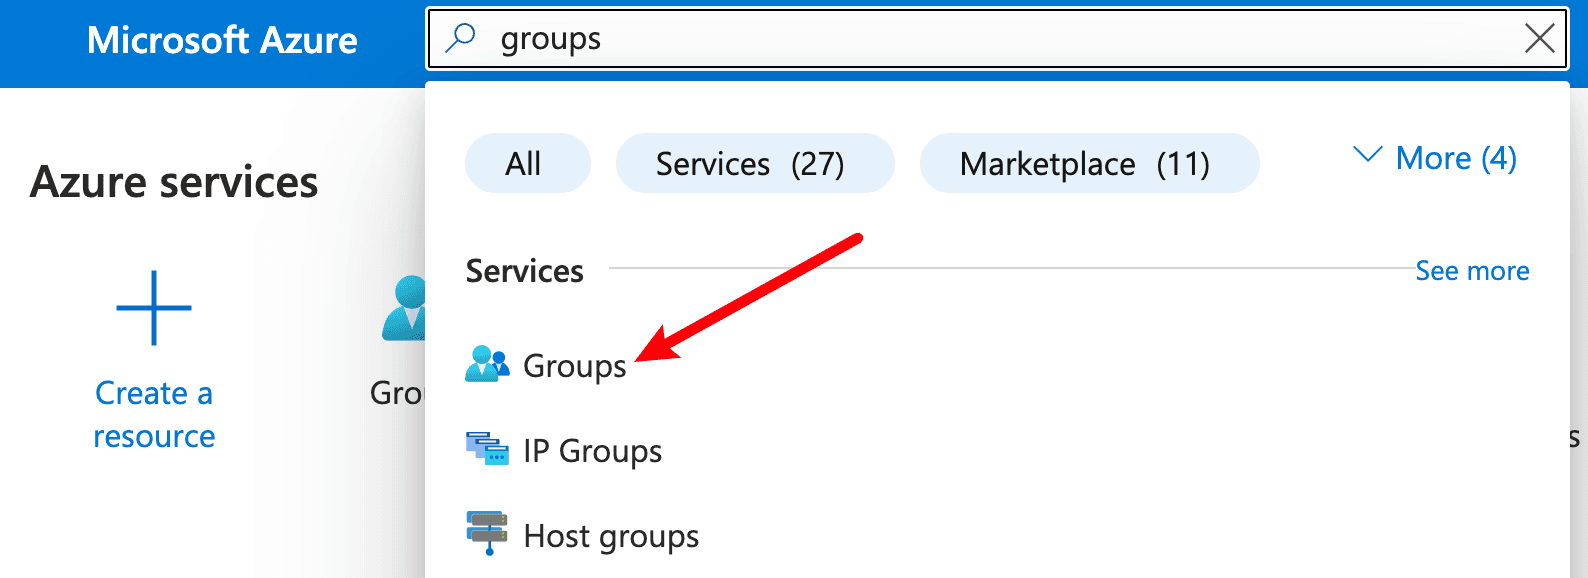
- Go to Groups → All groups
- Either select an existing group or click New group to create one
- If creating a new group:
- Follow this guide to create and configure a new group
- Select Security as the Group type if you want to add other groups as members (nesting), otherwise select Microsoft 365
- Copy the Group name (you will need this for configuration later)