Table of Contents

You need a Master Azure App Registration for EagleEye deployment.
The Master app acts as an orchestrator. It creates and configures the app registrations used by EagleEye during installation. It is required only during installation and can be safely deleted once installation succeeds. See Delete the Master App.
Before creating the Master app, read App Registrations reference for a simple overview of what the Master app does and what permissions it holds.
Step 2.1 - Create the App Registration
- Go to Azure Portal → App registrations → New registration
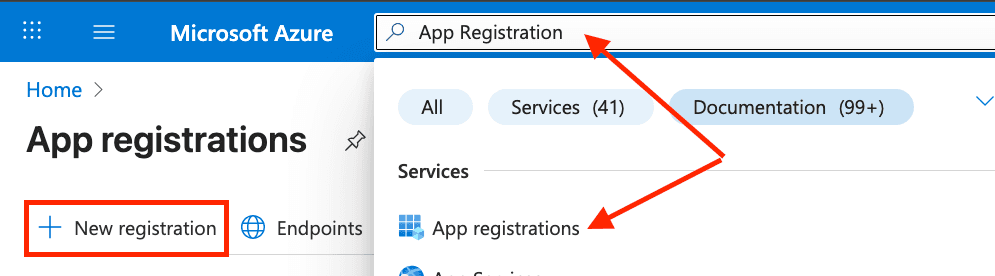
- Enter the app name: e.g.,
Northwind.EagleEye.Master - Set Supported account types to: Accounts in this organizational directory only (Single tenant)
- Click Register

Step 2.2 - Create a Client Secret
- Go to Certificates & secrets
- Click New client secret
- Add a description (e.g.,
Master Secret) - Select an expiry period → Add
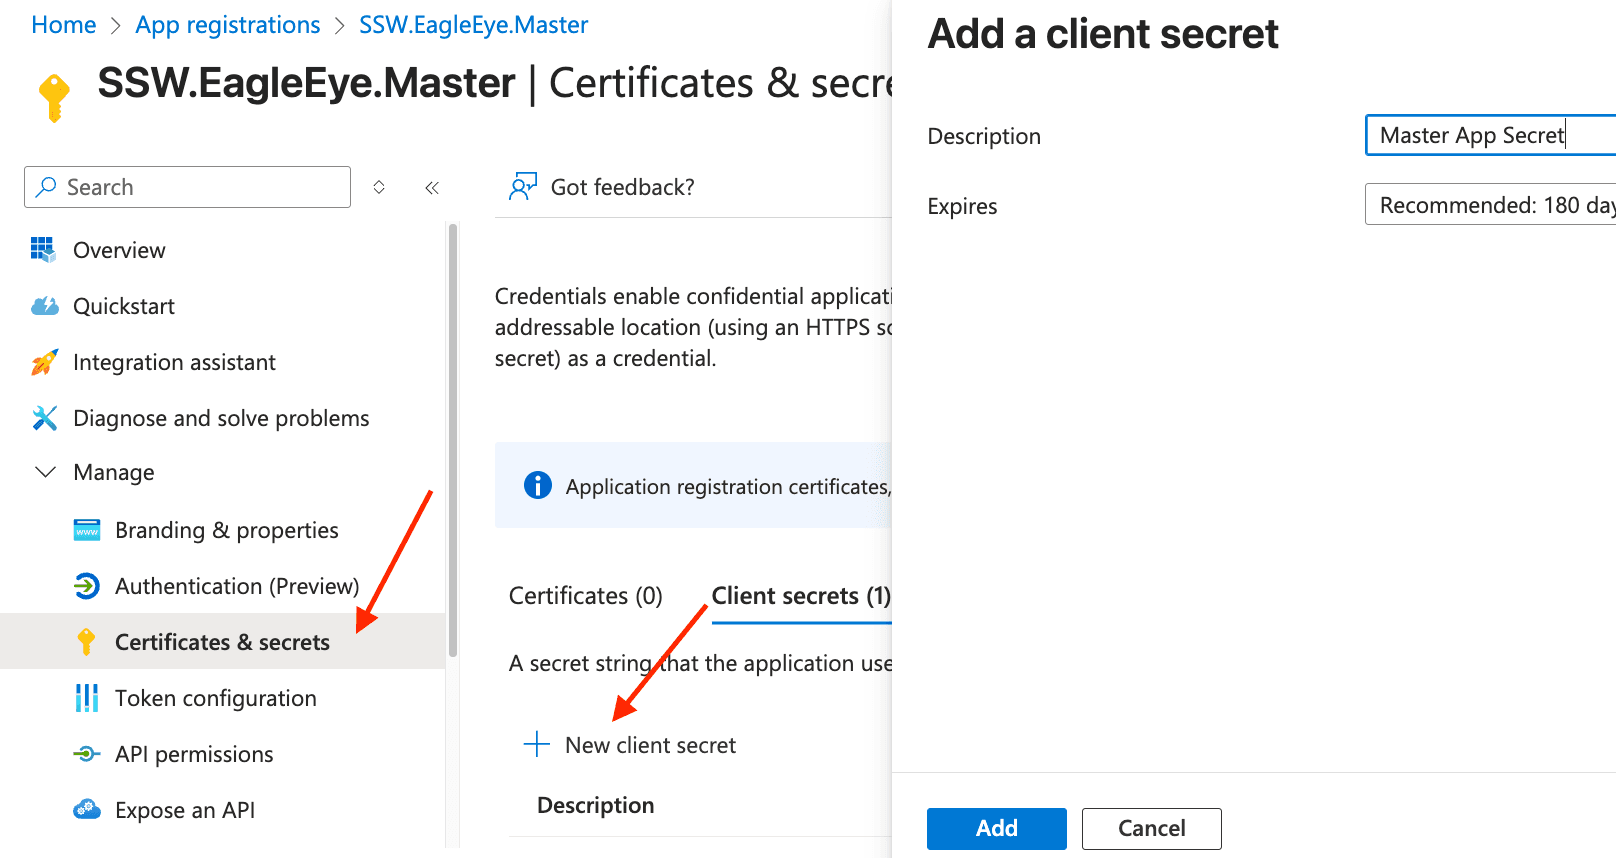
- Copy the secret value immediately (you will need this later; it will never be shown again)
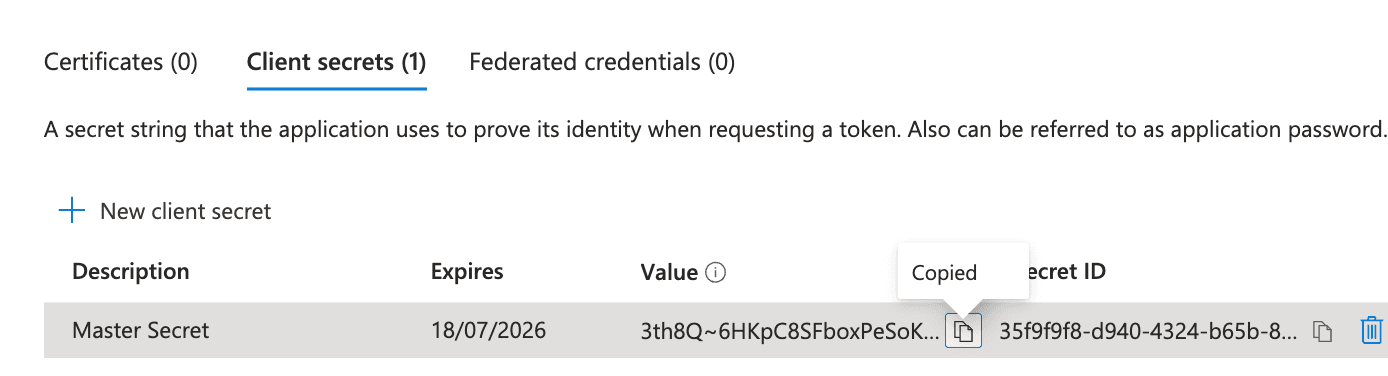
Warning: After deployment, remove the secret value from any temporary notes (clipboard, notepad, etc.).
Do not delete the secret from Azure
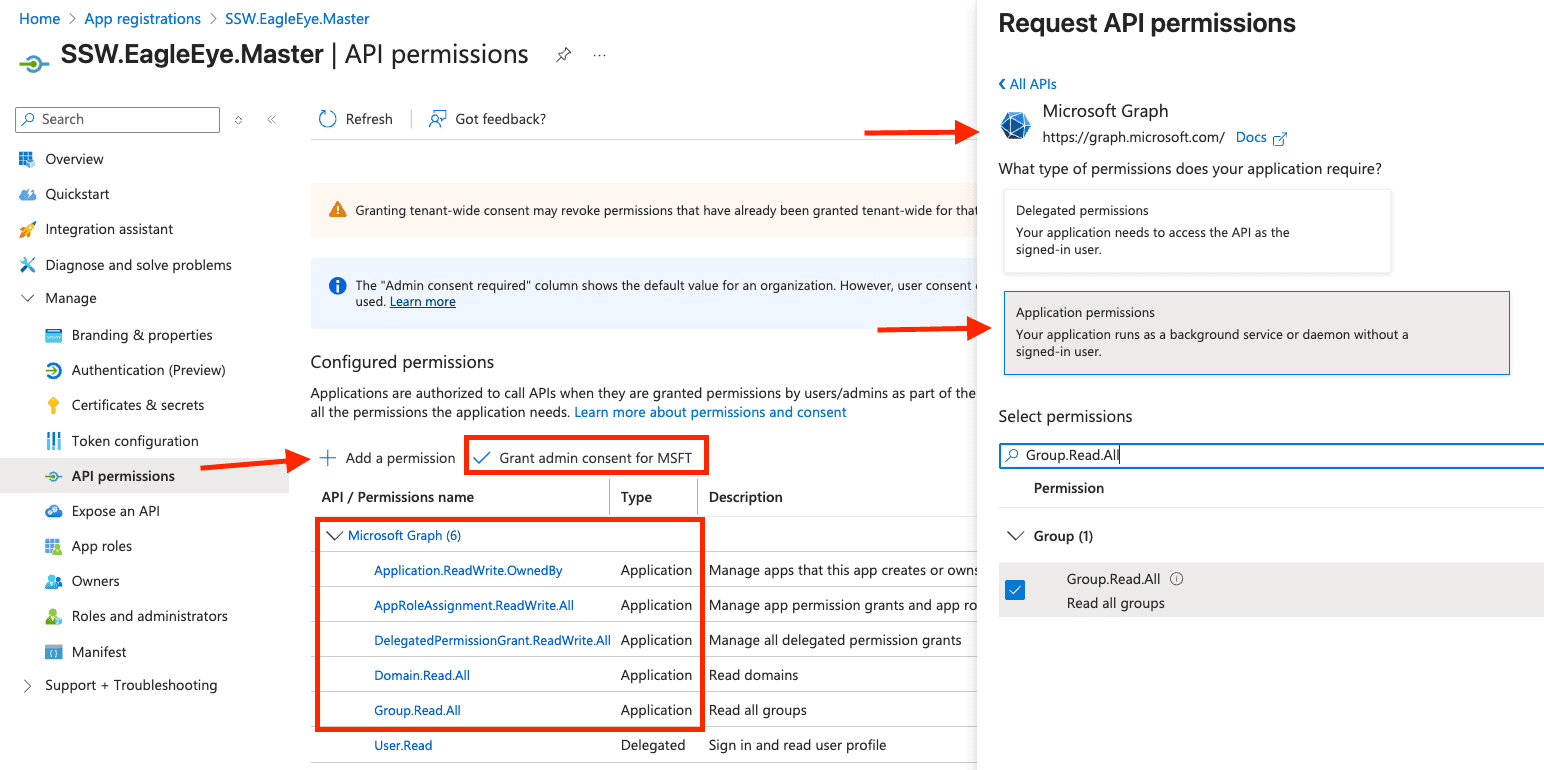
Step 2.3 - Configure API Permissions
For a detailed explanation of why each permission is required, see App Registrations reference.
- Go to your Master app registration (for example,
Northwind.EagleEye.Master) - Go to Manage → API permissions → Add a permission
- Select Microsoft Graph → Application permissions (Important: select Application permissions - not Delegated).
- Add:
Application.ReadWrite.OwnedBy- Create and update EagleEye app registrations (Engine,Api,Portal)AppRoleAssignment.ReadWrite.All- Grant application permissions (for example,Engine-> Microsoft Graph)DelegatedPermissionGrant.ReadWrite.All- Grant delegated API access (Portal->Api)Domain.Read.All- Read tenant domains for EagleEye internal email settingsGroup.Read.All- Read groups and memberships so deployment can find and assign the configured Entra group
- Click Add permissions
- Click Grant admin consent for your organization.