Table of Contents
Step 3 - Install From Azure Marketplace
Loading last updated info...

Step 3.1 - Get SSW EagleEye in Marketplace on Azure Portal
- Go to your Azure Portal
- Search for Marketplace in the search bar

- In the Marketplace, search for SSW EagleEye
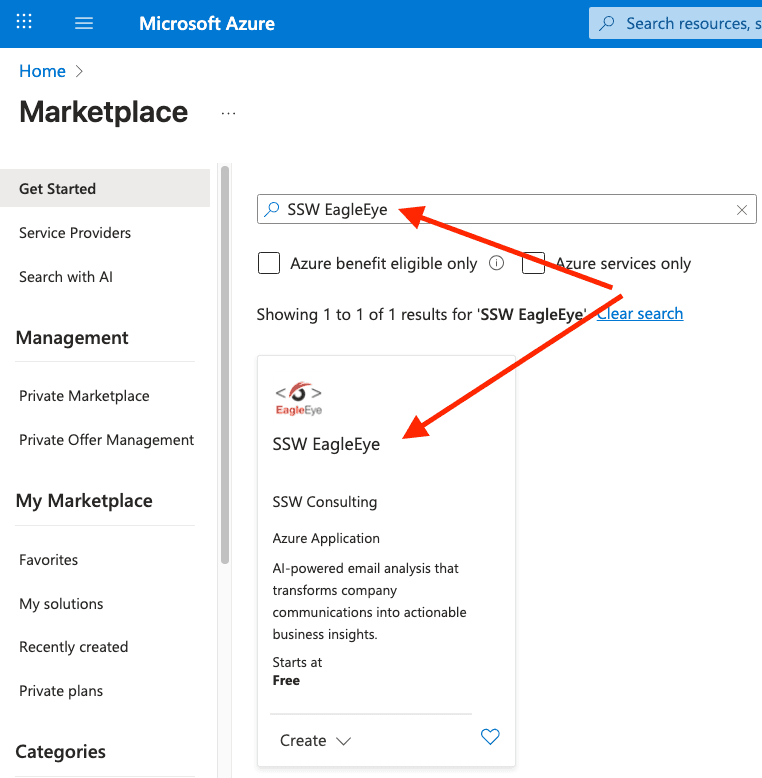
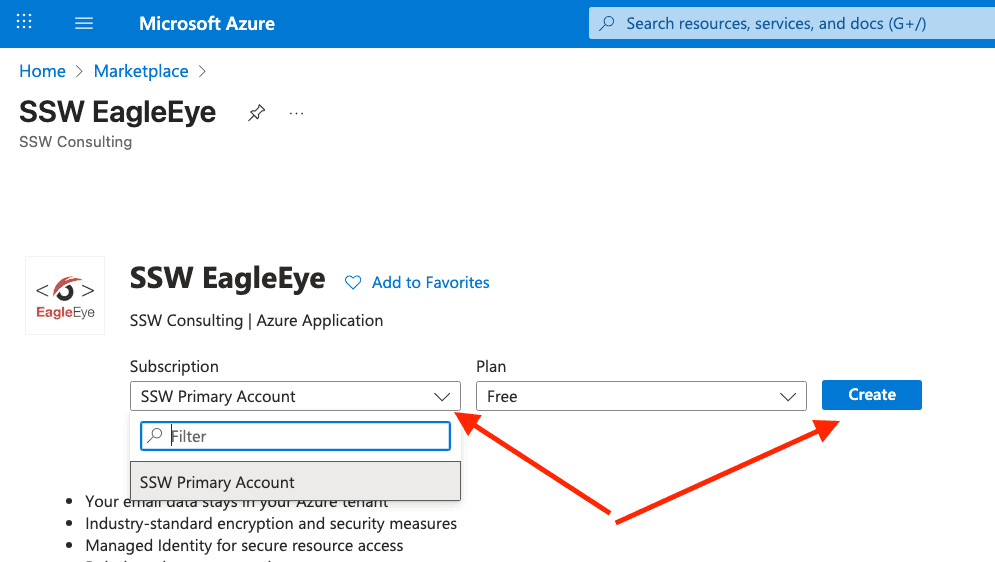
- Select your subscription and click Create
Step 3.2 - Configure Application Settings
Follow the deployment wizard with these configuration steps:
Step 3.2.1 - Basics
- Resource Group: Select an existing resource group or create a new one
- Region: Choose your preferred Azure region
- Application Name: Enter a unique name for your application

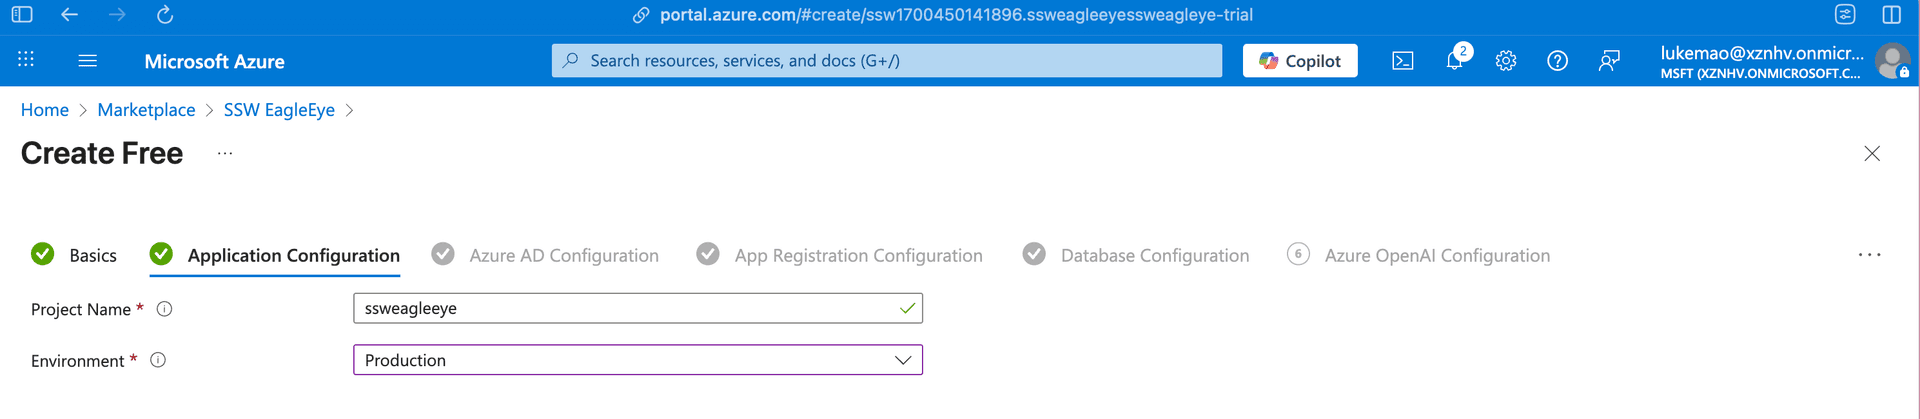
Step 3.2.2 - Application Configuration
- Project Name: Unique prefix for all resources
- Environment: Select
productionorstaging
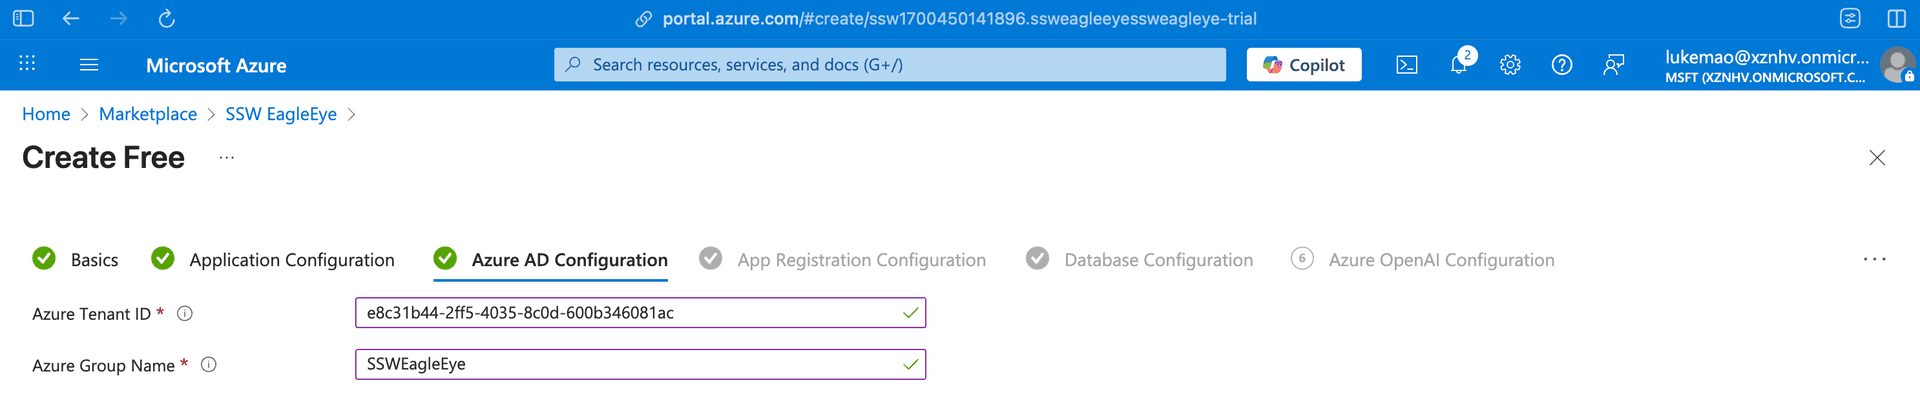
Step 3.2.3 - Azure AD Configuration
- Azure Tenant ID: Your Azure AD tenant ID
- Azure Group Name: Enter the Azure AD group name for email processing
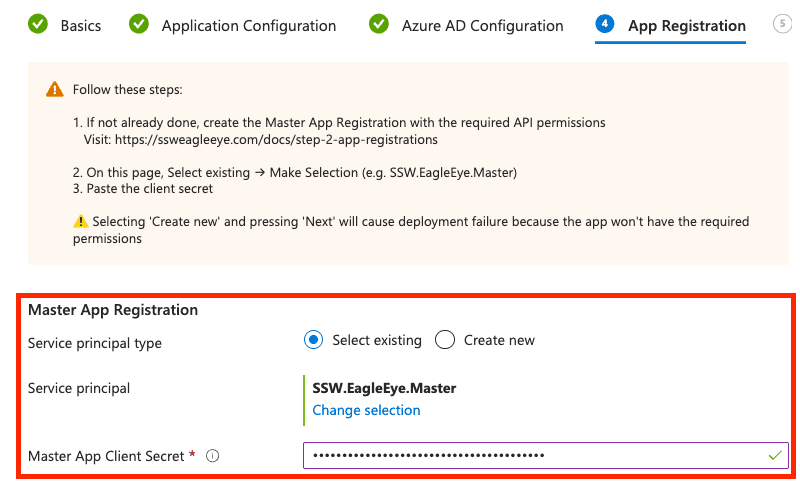
Step 3.2.4 - App Registration
You need to provide the details of Master App:
- Select Existing → Make Selection (e.g. SSW.EagleEye.Master) and enter the client secret.
Step 3.2.5 - Database Configuration
- Database Pricing Tier: Select appropriate tier (Basic, S0, S1, S2)
- Database Users:
- Read-Only user (read-only access): provide the username and password
- Admin and Read-Write users are generated automatically during deployment
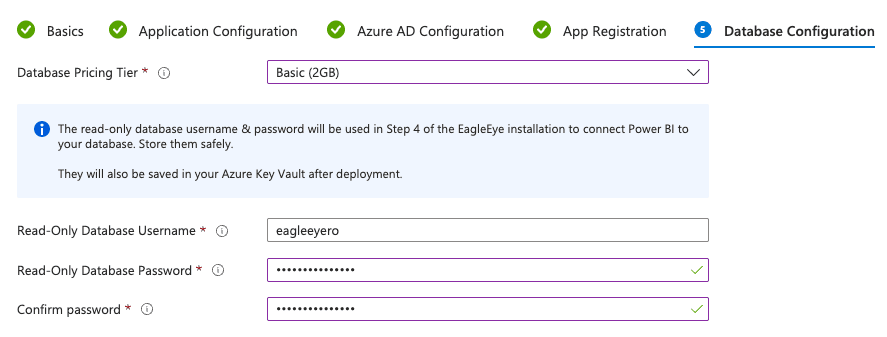
Where to find database credentials later: See Manage Credentials for Database.
Step 3.2.6 - Review and Deploy
- Review all configuration settings
- Click Create to start deployment
- Monitor deployment progress in the Azure Portal
- Deployment typically takes 15-30 minutes
Step 3.3 - Verify Deployment
- Access the Portal:
- Open your EagleEye resource group in Azure Portal (e.g.,
Northwind.EagleEye.RG). - Open the Portal container app (e.g.,
ca-nextjs-xxx).
- Click the Application URL and open it in your browser.

- Open your EagleEye resource group in Azure Portal (e.g.,
- Test Authentication: Sign in with a Microsoft account that belongs to the EagleEye group you configured. Only members of that group can access the portal.
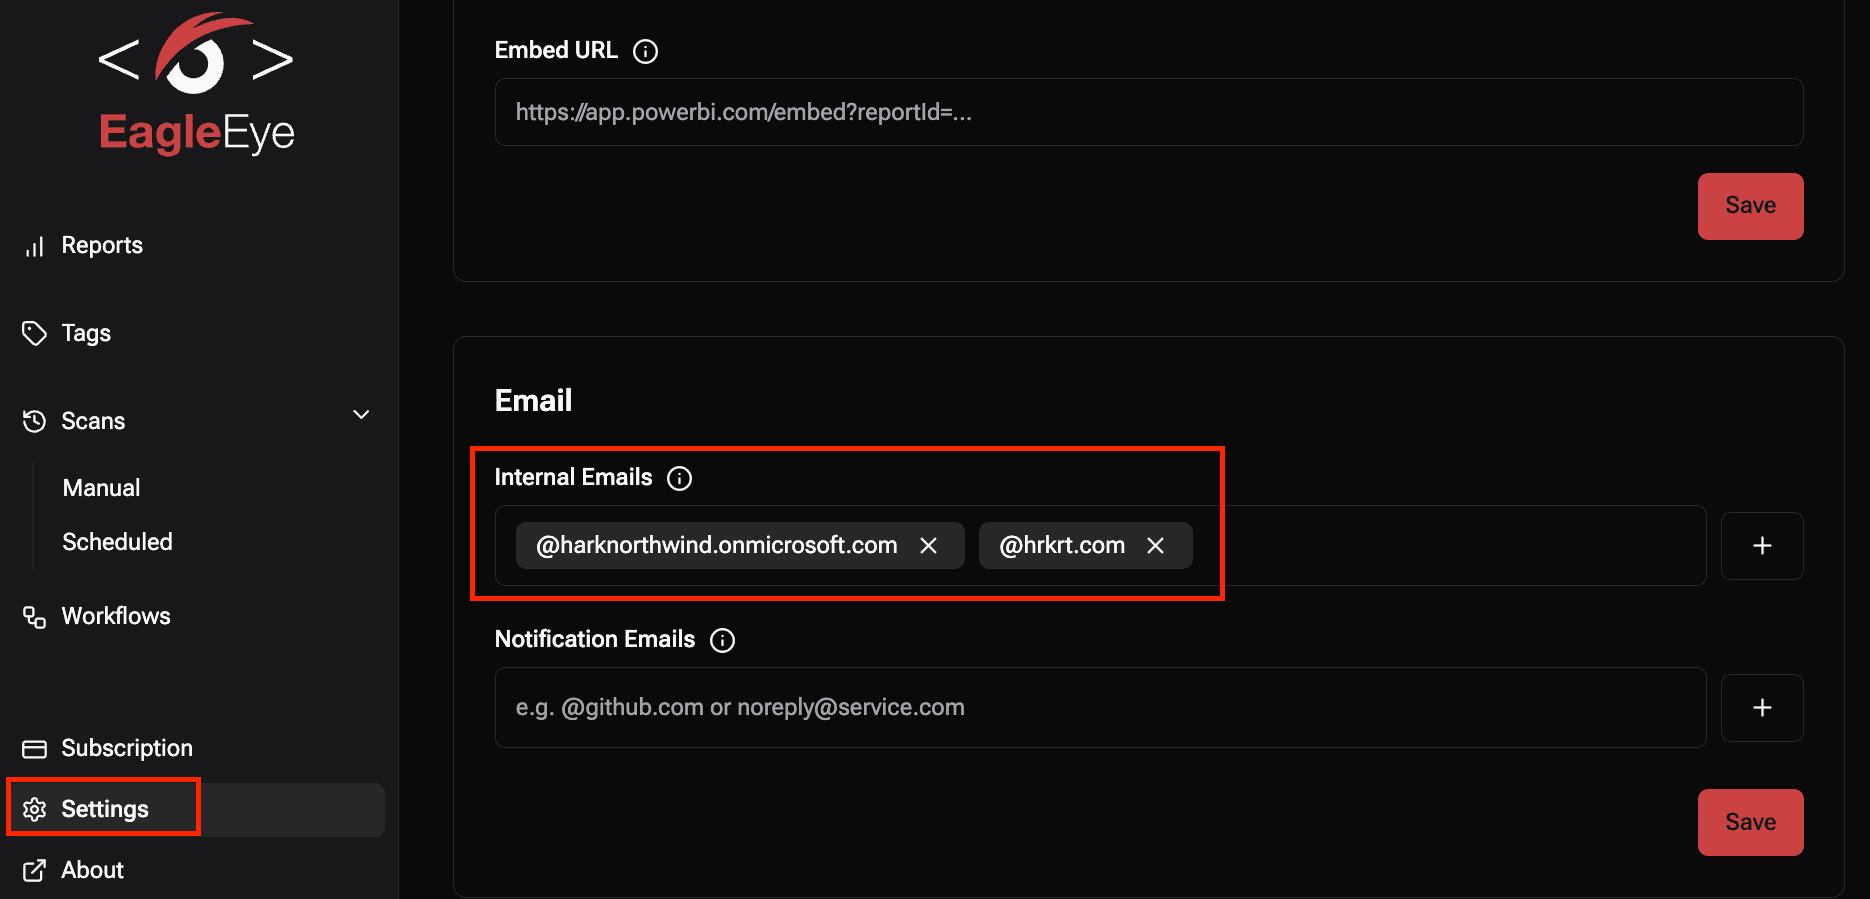
- Verify internal domains: In the EagleEye portal, go to Settings and confirm your internal email domains are listed for the tenant.
Common issues can be resolved by visiting:
- Set portal redirect URL
- Update Internal email domains
- Manage Credentials for Database
- Secret Management for App Registrations
Post-deployment steps
After installation:
- If you plan to use Non-AI Tags only, no further AI setup is required. EagleEye is ready to analyse emails with non-AI tags.
- If you plan to use AI Tags or AI with mentions tags, follow Deploy AI Model to enable Azure OpenAI processing.
- You can safely Delete the Master App after this step. It is no longer required.
Architecture Overview
The deployed solution includes:
- Container Apps Environment: Hosts the API (
ca-api-xxx), Portal (ca-nextjs-xxx), and email analysis jobs (cj-manual-xxx,cj-cli-xxx) - Azure SQL Database: Shared database with configured user access (
db-shared-xxx) - Azure OpenAI: Auto-provisioned Cognitive Services account in East US (
openai-shared-xxx). If you want to use AI-based tagging, deploy a chat model namedeagleeyeafter installation using the AI model guide. - Key Vault: Secure storage of shared secrets and configuration (
kv-shared-xxx) - Application Insights: Monitoring and telemetry (
ai-shared-xxx)