Table of Contents
Overview
EagleEye's Marketplace deployment automatically provisions an Azure OpenAI resource, but it does not deploy a chat model inside it.
This is intentional. Azure OpenAI model availability depends on the quotas available in each customer's subscription. So marketplace deployment is independent of model quotas.
This extra step is only required if you want to use:
If you plan to use Non-AI Tags only, you can skip this guide.
At the moment, EagleEye supports chat models only, so make sure you choose a compatible chat model.
✅ EagleEye supported models include:
gpt-4.1-mini (recommended)gpt-4o-minigpt-4.1-nanogpt-5-chat,gpt-5.1-chat,gpt-5.2-chatgpt-4.1,gpt-4ogpt-3.5-turbo
⚠️ Do not use:
- Reasoning models such as
gpt-5,gpt-5-mini,gpt-5-nano,gpt-5-pro,gpt-5-codex,gpt-5.4-mini,o1,o1-mini,o3-mini,o4-mini - Non-OpenAI Foundry catalog models such as Llama, Mistral, Grok, DeepSeek, Cohere, Kimi,
gpt-oss-*, and Phi - Non-chat models such as embeddings, image models, audio models, speech models, and legacy completion models
Step 1 - Deploy an AI chat model in Azure AI Foundry
You have 2 options. Pick the one that best fits your workflow.
Option A - Deploy via Azure AI Foundry portal
- Go to your EagleEye resource group used during Step 3 installation (e.g.,
Northwind.EagleEye.RG) - Find your
openai-shared-xxxresource and open it
- Click Go to Azure AI Foundry portal

- In Foundry portal, click Model catalog

- Pick a compatible chat model > Use this model

- On the deployment screen, set:
- Deployment name to exactly
eagleeye - Deployment type to
Global Standardif available. If not, choose another compatible deployment type with available quota - Tokens per Minute Rate Limit to at least
100
- Deployment name to exactly
- Click Deploy and wait for the deployment to become active
❗️ Important: The deployment name must be exactly eagleeye. If you use a different name, EagleEye will fail to find the model at runtime.
Option B - Deploy via AI agent
If you have an AI coding agent connected to Azure MCP, or you have az CLI installed and signed in with the same account you used to deploy EagleEye, paste this prompt into the agent:
The agent should:
- Ask for the resource group you used during Step 3 installation (e.g.,
Northwind.EagleEye.RG) - Find the
openai-shared-xxxAzure OpenAI resource in that resource group - Show which compatible non-reasoning chat models have available quota
- Ask which model and capacity you want to deploy
- Create the deployment with the exact name
eagleeye
💡 Tip: Review the commands your agent proposes before approving them. AI agents can still make mistakes.
Step 2 - Verify AI email analysis works
Use EagleEye's built-in test flow to verify the model deployment without sending any real emails:
1. Open your EagleEye Portal.
2. Go to Tags → New Tag, or edit an existing tag.

3. Set the tag type to AI or AI with Mentions.

4. In the AI decision prompt field, enter a simple test prompt such as:
Check if the email has been checked by someone by looking for keywords like "Checked by xx", "Checked by xx & xx", or similar variations.
5. Paste sample email content such as:
(Checked by Adam)Hi team, I just checked the invoice from Acme Corp and everything looks good. Regards, Hark
6. Click Test.
Expected result: the response box shows valid JSON such as {"Result": true} or {"Result": false}.
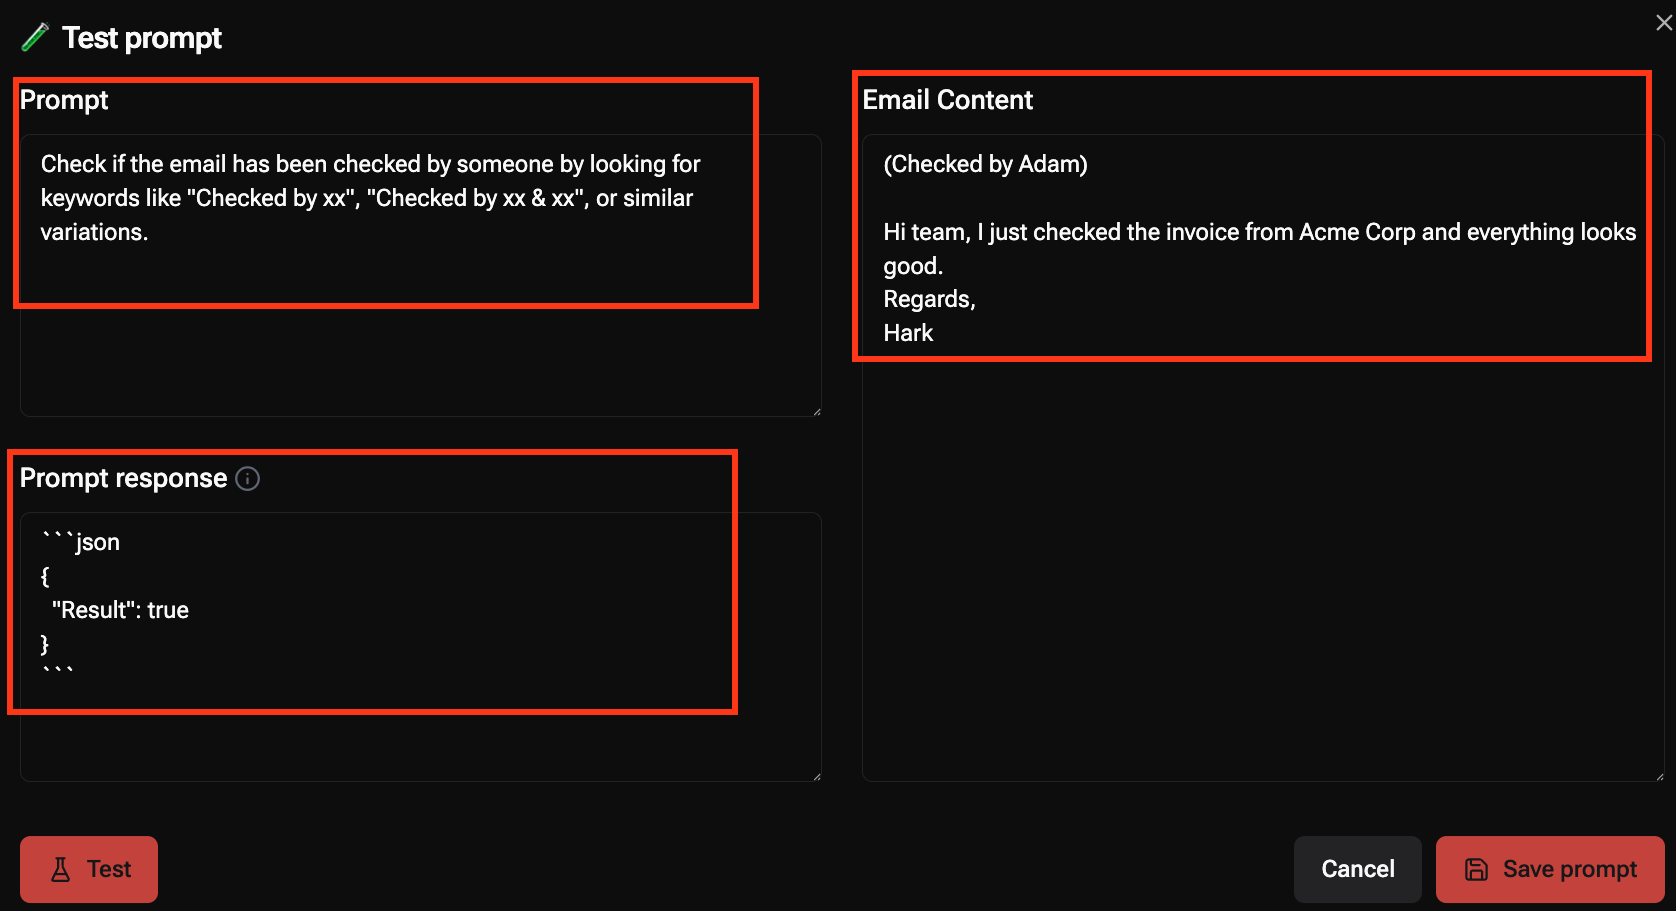 | 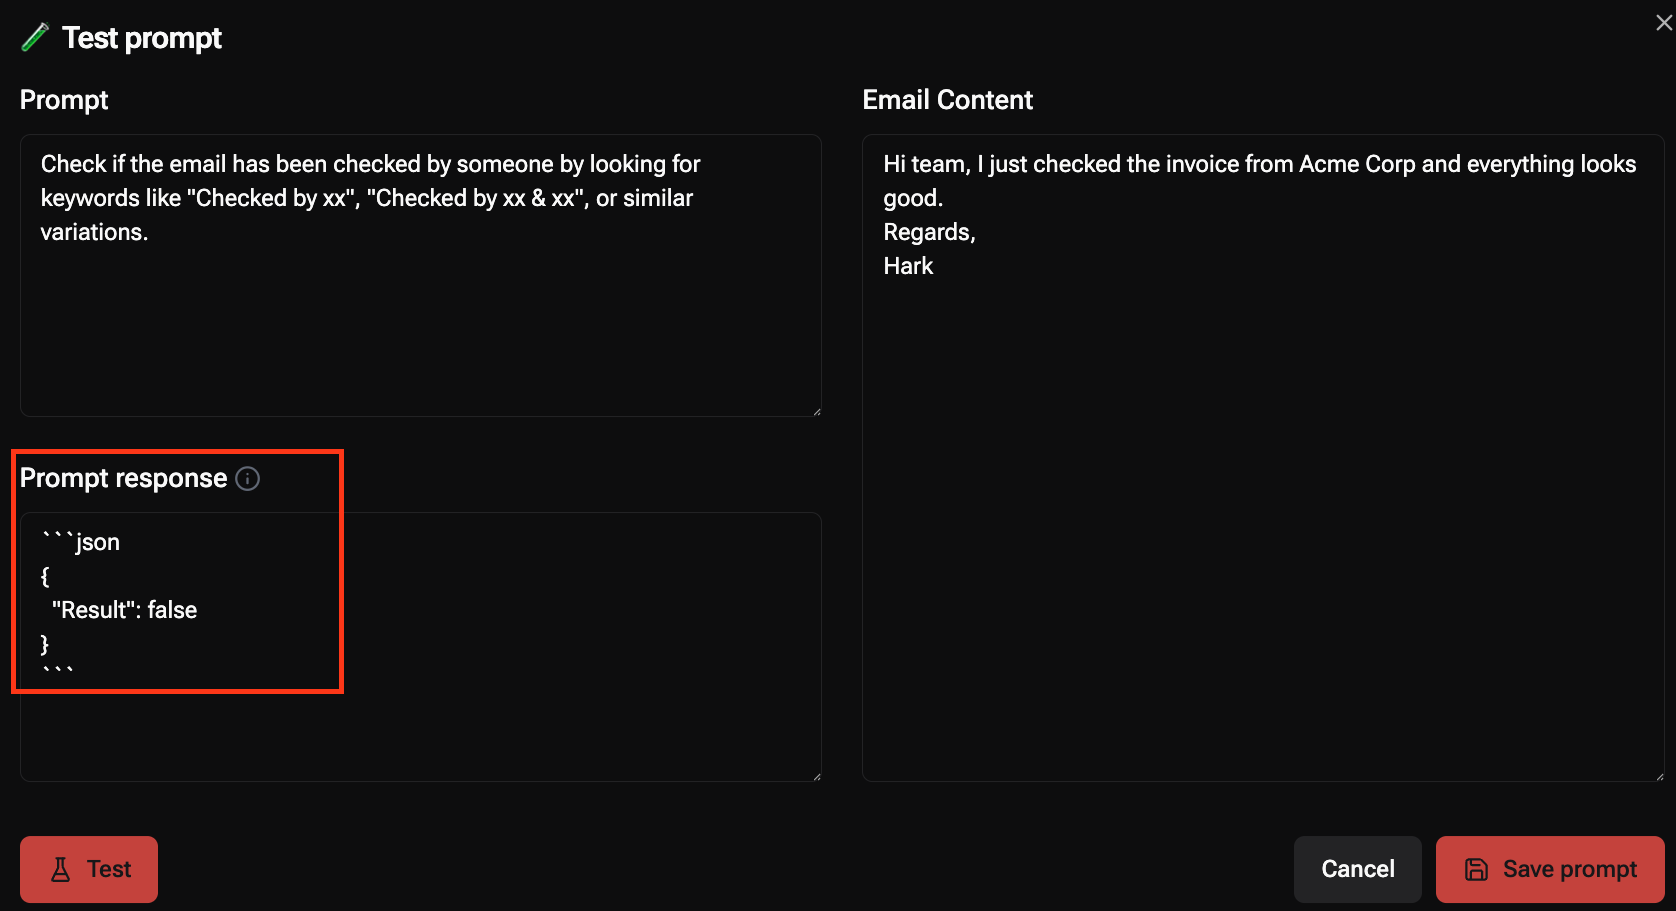 |
| “Checked by” present = True | “Checked by” not present = False |
⚠️ If the model is not deployed, EagleEye will show an error banner instead of a JSON result.